Brogni's Second Labor
Brogni's Second Labor Champion Loadout
This Hydra Underpriest Brogni build is meant for the Infinity Shield clan boss team composition. Underpriest Brogni is one of two crucial pieces that are required to pull off this team composition. Growing the shield with his A2 ability is absolutely mandatory to make this composition work correctly. That is the main priority of this build.
There is a lot we can do to maximize the shields growth potential. Starting with our artifact set choice, then with blessings and mastery options. As far as stats to aim for, you will want to get as much attack and critical damage as you can to maximize your damage. Brogni is usually the second slowest champion in this composition behind Corpulent Cadaver.
I usually focus on getting the speeds right first. Then I get his critical rating to the right percentage, depending on who his teammates I'm bringing are and if they bring a critical rating buff or not. Then focus on getting his critical damage as high as possible. I'll take whatever attack my best gear provides. The higher, the better. Some struggle to get more than 2,000, others can get up to 5,000 or anywhere in between. It would be nice if there was also enough accuracy to land his HP Burn in the build as well.
Strategy Description
Artifacts Description
Which artifact set to choose to do the most damage? There are two lines of logic regarding this decision. You can use a set like Savage or Lethal to ignore defense for more damage. The other option is to use a Reflex set to help get more A2 chances for more damage.
Personally for myself, I'm doing more damage with the Lethal set. I like hitting for more damage and having the opportunity to get a refresh anyways. You may have better Reflex gear available. Your experience may vary depending on how good of gear you have for either of those sets. I would recommend to use whatever is best for you. Check your stats.
If you have the accessories for it, obviously the Refresh accessories will be best here. You will get more chances to A2 and after a short while the heads will be permanently dead anyways.
* Some artifact sets have upgraded versions available. If you have a better upgraded version of this recommended artifact set, definitely use that instead.
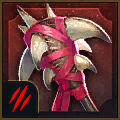
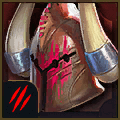
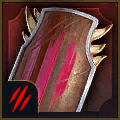
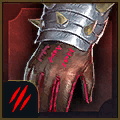
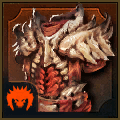
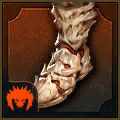


* There is an upgraded version of the Savage set called Lethal that can be crafted from materials gained from the Doom Tower when fighting the Dark Fae boss.
The Offense tree is an obvious choice. I went with all of the extra damage options all the way down to Helmsmasher. I like Helmsmasher here to ignore some additional defense and do some more damage on his attacks. To help grow the shield even more with his A2.
The other option I went with is the Support tree for some extra accuracy and Sniper to help land his HP Burn debuff. Lasting Gifts can also help with his Shield, should you need to use it or you could just go with Master Hexer to extend the debuff duration. Either way I like Cycle of Magic here.


![Shield Breaker: Increases damage inflicted to targets under [Shield] buffs by 25% Shield Breaker mastery icon.](/images/raid-shadow-legends/masteries/shield-breaker.png)


![Opportunist: Increases damage inflicted to targets with [Stun], [Sleep], [Fear], [True Fear], [Freeze], [Petrification] debuffs by 12%. Opportunist mastery icon.](/images/raid-shadow-legends/masteries/opportunist.png)


![Blood Shield: Places a [Shield] buff on this Champion for 1 turn when this Champion kills an enemy (except Boss' minions). The value of the [Shield] is equal to 15% of this Champion's MAX HP. Occurs once per turn Blood Shield mastery icon.](/images/raid-shadow-legends/masteries/blood-shield.png)


![Rejuvenation: Increases the amount of healing and the value of [Shield] buffs this Champion receives by 5% Rejuvenation mastery icon.](/images/raid-shadow-legends/masteries/rejuvenation.png)
![Mighty Endurance: Decreases the damage received by 10% if this Champion has [Stun], [Sleep], [Fear], [True Fear], [Freeze], [Petrification] debuffs. Mighty Endurance mastery icon.](/images/raid-shadow-legends/masteries/mighty-endurance.png)


![Wisdom of Battle: Has a 30% chance of placing a [Block Debuffs] buff on this Champion for 1 turn when [Stun], [Sleep], [Fear], [True Fear], [Freeze], [Petrification] debuffs expire on this Champion. Wisdom of Battle mastery icon.](/images/raid-shadow-legends/masteries/wisdom-of-battle.png)


![Harvest Despair: Has a 60% chance of placing a [Leech] debuff for 1 turn when placing [Stun], [Sleep], [Fear], [True Fear], [Freeze], [Petrification] debuffs. Harvest Despair mastery icon.](/images/raid-shadow-legends/masteries/harvest-despair.png)


![Deterrence: Has a 20% chance to counterattack an enemy when they apply a [Stun], [Sleep], [Fear], [True Fear], [Freeze], [Petrification], or [Sheep] debuff on an ally. Cooldown: 1 turn Deterrence mastery icon.](/images/raid-shadow-legends/masteries/deterrence.png)


![Fearsome Presence: Increases the chances of placing a [Stun], [Sleep], [Freeze], [Fear], [True Fear], [Provoke], or [Sheep] debuff from Skills or Artifacts by 5% Fearsome Presence mastery icon.](/images/raid-shadow-legends/masteries/fearsome-presence.png)


![Shieldbearer: Increases the value of [Shield] buffs this Champion casts by 5% Shieldbearer mastery icon.](/images/raid-shadow-legends/masteries/shieldbearer.png)


![Healing Savior: Increases the amount of healing and the value of [Shield] buffs placed by this Champion by 10% if the target ally has 40% HP or less Healing Savior mastery icon.](/images/raid-shadow-legends/masteries/healing-savior.png)


![Merciful Aid: Increases the amount of healing and the value of [Shield] buffs placed by this Champion by 15% if the target ally has [Stun], [Sleep], [Fear], [True Fear], or [Freeze], debuffs Merciful Aid mastery icon.](/images/raid-shadow-legends/masteries/merciful-aid.png)


![Lasting Gifts: Has a 30% chance to extend the duration of any buff cast by this Champion by 1 turn. It will not extend [Block Damage], [Unkillable], [Revive on Death], or [Taunt] buffs. Lasting Gifts mastery icon.](/images/raid-shadow-legends/masteries/lasting-gifts.png)

![Sniper: Increases the chances of placing any buff from Skills or Artifacts by 5%. It will not increase the chances of placing [Stun], [Sleep], [Freeze], [Fear], [True Fear], [Provoke], or [Petrification] debuffs. Sniper mastery icon.](/images/raid-shadow-legends/masteries/sniper.png)
![Master Hexer: Has a 30% chance to extend the duration of any buff cast by this Champion by 1 turn. It will not extend [Stun], [Sleep], [Freeze], [Provoke], [Fear], [True Fear], [Bomb], or [Petrification] debuffs. Master Hexer mastery icon.](/images/raid-shadow-legends/masteries/master-hexer.png)



Hero's Soul
Crushing Rend
Level 1 Blessing
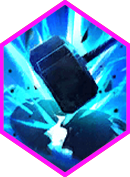
Hero's Soul is a nice benefit for early levels to increase some damage to your A2 whenever you use it. It may even be the best blessing at the high level but I haven't tested it prior to this writing. The other option would be Crushing Rend. After a while Corpulent Cadaver one shots everything anyways so stuff spawns and re-spawns very quickly.
Level 6 Blessing
I'm going to go with Crushing Rend here but Hero's Soul could be the better option with some testing. Who knows. Either way they both will add some damage to your A2 ability when you use it. Which is the goal is this build.
