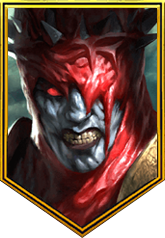
Life Drinker
Life Drinker Champion Loadout
Little Miss Annie is one of the hardest hitting single target champions in the entire game but when the city of Sintranos came out and we got to see the new boss, it was clear as day that she was built perfectly for the Amius the Lunar Archon fight. Having a Heal Reduction built into the A1 is the best way to keep Heal Reduction on Amius the entire fight. She really has a nice A1 for this fight. It hits three times and has a 75% chance to land the Heal Reduction debuff. All but ensuring it will land on each attempt.
The problem is that Little Miss Annie has super low base stats when it comes to health and defense. Keeping her alive and upright proves to be the task at hand here. Even if it goes a bit against conventional wisdom. Building her with enough accuracy and resistance is easy enough but built to survive? That's another thing entirely. Thankfully she has an amazing passive even if she does die, so that when she is revived she instantly attacks the person who killed her. This keeps the Heal Reduction on Amius and up the entire fight and pairs well with many different champions like Godseeker Aniri.
As with any champions in this fight, if you can get Brimstone on her, all the better. Since most of this fight's damage comes from Brimstone and Poison.
Strategy Description
Artifacts Description
You really want to focus on the stats here. Hitting minimum thresholds. The first is speed. You can't be too slow. Get your speed above 250 for Amius hard mode. Next you will need accuracy. You need 400-ish with an accuracy banner and 450+ without. If you can't land the Heal Reduction there is no point bringing her to the fight. You will need someone with Brimstone if you want to make the fight quicker/easier as well.
The next and biggest worry possibly in the fight is your health. The big hitting ability from Amius ignores defense so building her with as much health as possible is the second priority. We want her to live through the hits. We don't want Amius going crazy. The more controlled the fight is, the better. Making her tanky enough to survive is quite a feat.
If you can manage to get great accuracy, great max health and some defense, then start racking up the resistance. The ability to resist debuffs in this fight, like the Stun, make it all that much smoother. You can always bring cleansers to the fight as well and build them faster with high resist. That'll work, too.
* Some artifact sets have upgraded versions available. If you have a better upgraded version of this recommended artifact set, definitely use that instead.

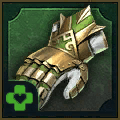
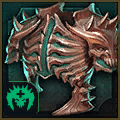
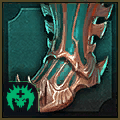
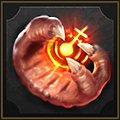

Conventional wisdom says when you have the best single target nuker in the game you build them to nuke but not in this case. Conventional wisdom this time says most of your damage comes from Brimstone/poisons and against this boss you should focus on trying to stay alive. So that is what we are going to do here. Little Miss Annie has low base stats in health and defense. At the end you can decide whether you have enough accuracy or not, then decide between more accuracy or resistance. Being able to resist stuns and debuffs is a great way to keep Heal Reduction up as much as possible.
Starting with the defense tree, we're going to get ourselves some damage reduction from critical hits as well as some resistance. Amius A1 in his alternative form can hit really hard and can critical hit. It is also a single target attack. So having more defense and aoe damage mitigation from Tough Skin and Blast Proof is a pure waste. We grab Rejuvenation to get back to Resurgent and Shadow Heal. You will want to stay topped up at full health as much as possible throughout the fight. The boss heals up a ton as well.
Delay Death mitigation is fantastic. Retribution and Deterrence will help keep the Heal Reduction up, especially if you can resist the stun. I have enough accuracy in my build that I went with Unshakeable for my tier 6 mastery (which I would recommend to min/max) instead of Eagle Eye but you do you.
Now down the support tree, if you can find enough accuracy in your gear, it might be better to go with Steadfast and Shieldbearer for the extra 800 health and 5% extra shield you will get if/when you die and are revived. If you need the extra accuracy, then by all means get it. You will need to land the Heal Reduction debuff (and possibly Brimstone), that is why you brought her in the first place. We're grabbing Swarm Smiter either way. Go ahead and snag Lore of Steel for more stat boosts.
You could grab Sniper to round out the list to help land the Heal Reduction but I prefer to have the Heal Reduction up for one more turn with Master Hexer. That should do it, unless you really need Eagle Eye. Then by all means grab it, too. Just remember, no Cycle of Magic.


![Shield Breaker: Increases damage inflicted to targets under [Shield] buffs by 25% Shield Breaker mastery icon.](/images/raid-shadow-legends/masteries/shield-breaker.png)


![Opportunist: Increases damage inflicted to targets with [Stun], [Sleep], [Fear], [True Fear], [Freeze], [Petrification] debuffs by 12%. Opportunist mastery icon.](/images/raid-shadow-legends/masteries/opportunist.png)


![Blood Shield: Places a [Shield] buff on this Champion for 1 turn when this Champion kills an enemy (except Boss' minions). The value of the [Shield] is equal to 15% of this Champion's MAX HP. Occurs once per turn Blood Shield mastery icon.](/images/raid-shadow-legends/masteries/blood-shield.png)


![Rejuvenation: Increases the amount of healing and the value of [Shield] buffs this Champion receives by 5% Rejuvenation mastery icon.](/images/raid-shadow-legends/masteries/rejuvenation.png)
![Mighty Endurance: Decreases the damage received by 10% if this Champion has [Stun], [Sleep], [Fear], [True Fear], [Freeze], [Petrification] debuffs. Mighty Endurance mastery icon.](/images/raid-shadow-legends/masteries/mighty-endurance.png)


![Wisdom of Battle: Has a 30% chance of placing a [Block Debuffs] buff on this Champion for 1 turn when [Stun], [Sleep], [Fear], [True Fear], [Freeze], [Petrification] debuffs expire on this Champion. Wisdom of Battle mastery icon.](/images/raid-shadow-legends/masteries/wisdom-of-battle.png)


![Harvest Despair: Has a 60% chance of placing a [Leech] debuff for 1 turn when placing [Stun], [Sleep], [Fear], [True Fear], [Freeze], [Petrification] debuffs. Harvest Despair mastery icon.](/images/raid-shadow-legends/masteries/harvest-despair.png)


![Deterrence: Has a 20% chance to counterattack an enemy when they apply a [Stun], [Sleep], [Fear], [True Fear], [Freeze], [Petrification], or [Sheep] debuff on an ally. Cooldown: 1 turn Deterrence mastery icon.](/images/raid-shadow-legends/masteries/deterrence.png)


![Fearsome Presence: Increases the chances of placing a [Stun], [Sleep], [Freeze], [Fear], [True Fear], [Provoke], or [Sheep] debuff from Skills or Artifacts by 5% Fearsome Presence mastery icon.](/images/raid-shadow-legends/masteries/fearsome-presence.png)


![Shieldbearer: Increases the value of [Shield] buffs this Champion casts by 5% Shieldbearer mastery icon.](/images/raid-shadow-legends/masteries/shieldbearer.png)


![Healing Savior: Increases the amount of healing and the value of [Shield] buffs placed by this Champion by 10% if the target ally has 40% HP or less Healing Savior mastery icon.](/images/raid-shadow-legends/masteries/healing-savior.png)


![Merciful Aid: Increases the amount of healing and the value of [Shield] buffs placed by this Champion by 15% if the target ally has [Stun], [Sleep], [Fear], [True Fear], or [Freeze], debuffs Merciful Aid mastery icon.](/images/raid-shadow-legends/masteries/merciful-aid.png)


![Lasting Gifts: Has a 30% chance to extend the duration of any buff cast by this Champion by 1 turn. It will not extend [Block Damage], [Unkillable], [Revive on Death], or [Taunt] buffs. Lasting Gifts mastery icon.](/images/raid-shadow-legends/masteries/lasting-gifts.png)

![Sniper: Increases the chances of placing any buff from Skills or Artifacts by 5%. It will not increase the chances of placing [Stun], [Sleep], [Freeze], [Fear], [True Fear], [Provoke], or [Petrification] debuffs. Sniper mastery icon.](/images/raid-shadow-legends/masteries/sniper.png)
![Master Hexer: Has a 30% chance to extend the duration of any buff cast by this Champion by 1 turn. It will not extend [Stun], [Sleep], [Freeze], [Provoke], [Fear], [True Fear], [Bomb], or [Petrification] debuffs. Master Hexer mastery icon.](/images/raid-shadow-legends/masteries/master-hexer.png)



Brimstone

Brimstone
Level 1 Blessing
Brimstone at any level is the best source of damage in the game for this boss. You will already have the accuracy to land Heal Reduction so you can safely add Brimstone to the team if you have the blessing here and not elsewhere.
If Little Miss Annie ends up being your alternate form tank for the big A1 attack, then you may consider using Faultless Defense. Amius will target the champion with the lowest hp for this attack, which Annie could be and this would help mitigate the second hit of the attack. Something to think about.
Level 6 Blessing
Same can be said for high level Brimstone that was said for the low level version. It is the best source of damage in the game for Amius and you already have the accuracy to land it so why not.
For Fautlless Defense, in it's highest form it can help mitigate the second hit of the attack by 35%. Which is quite huge. If you're having trouble keeping her alive, this could help.

